How to Make Dry Ice at Home Easy With Baking Soda
Here's a fun science experiment that will definitely get a "wow" from the kids. Combine baking soda and vinegar to make sodium acetate, or hot ice! It crystalizes instantly when you pour it, allowing you to create a tower of crystals. Since the process of crystallization is exothermic, the "ice" that forms will be hot to the touch. Science is so cool!

Making hot ice is a simple process, and you probably have everything you need on hand. You'll need a couple of hours, though, so keep that in mind.
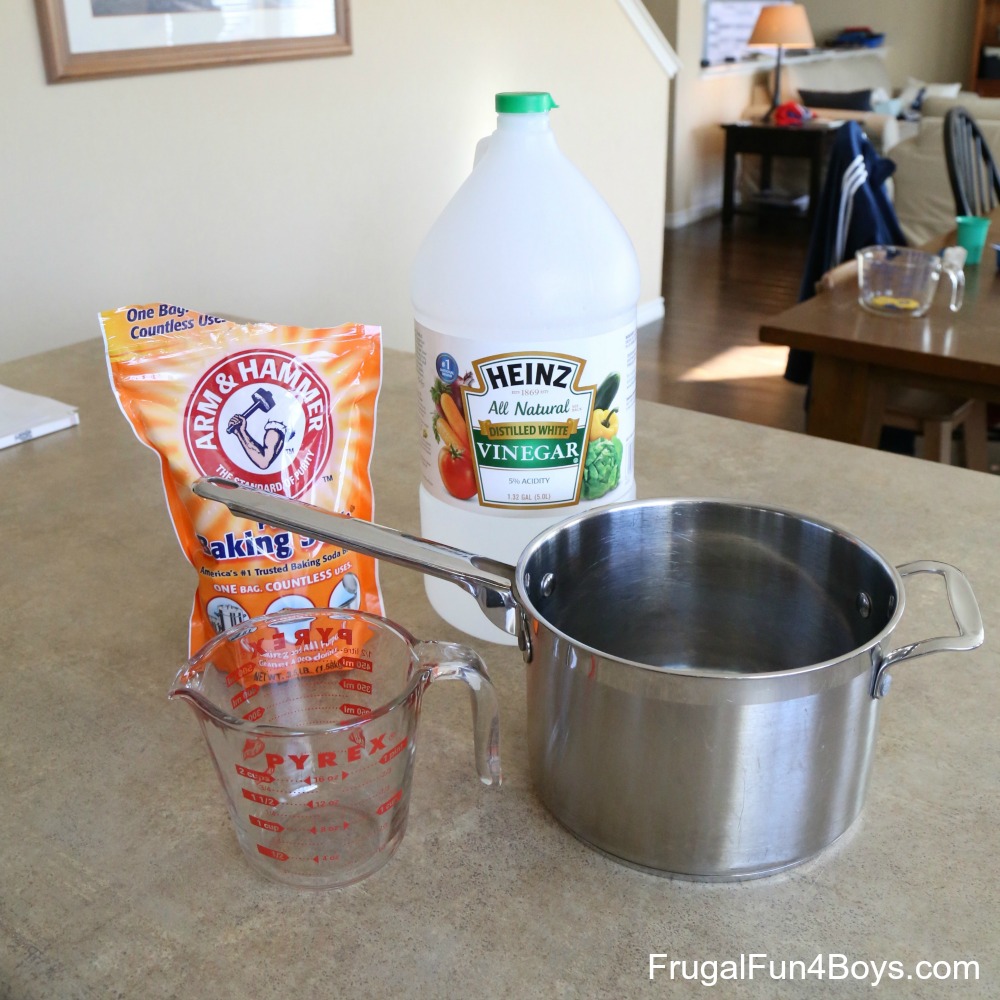
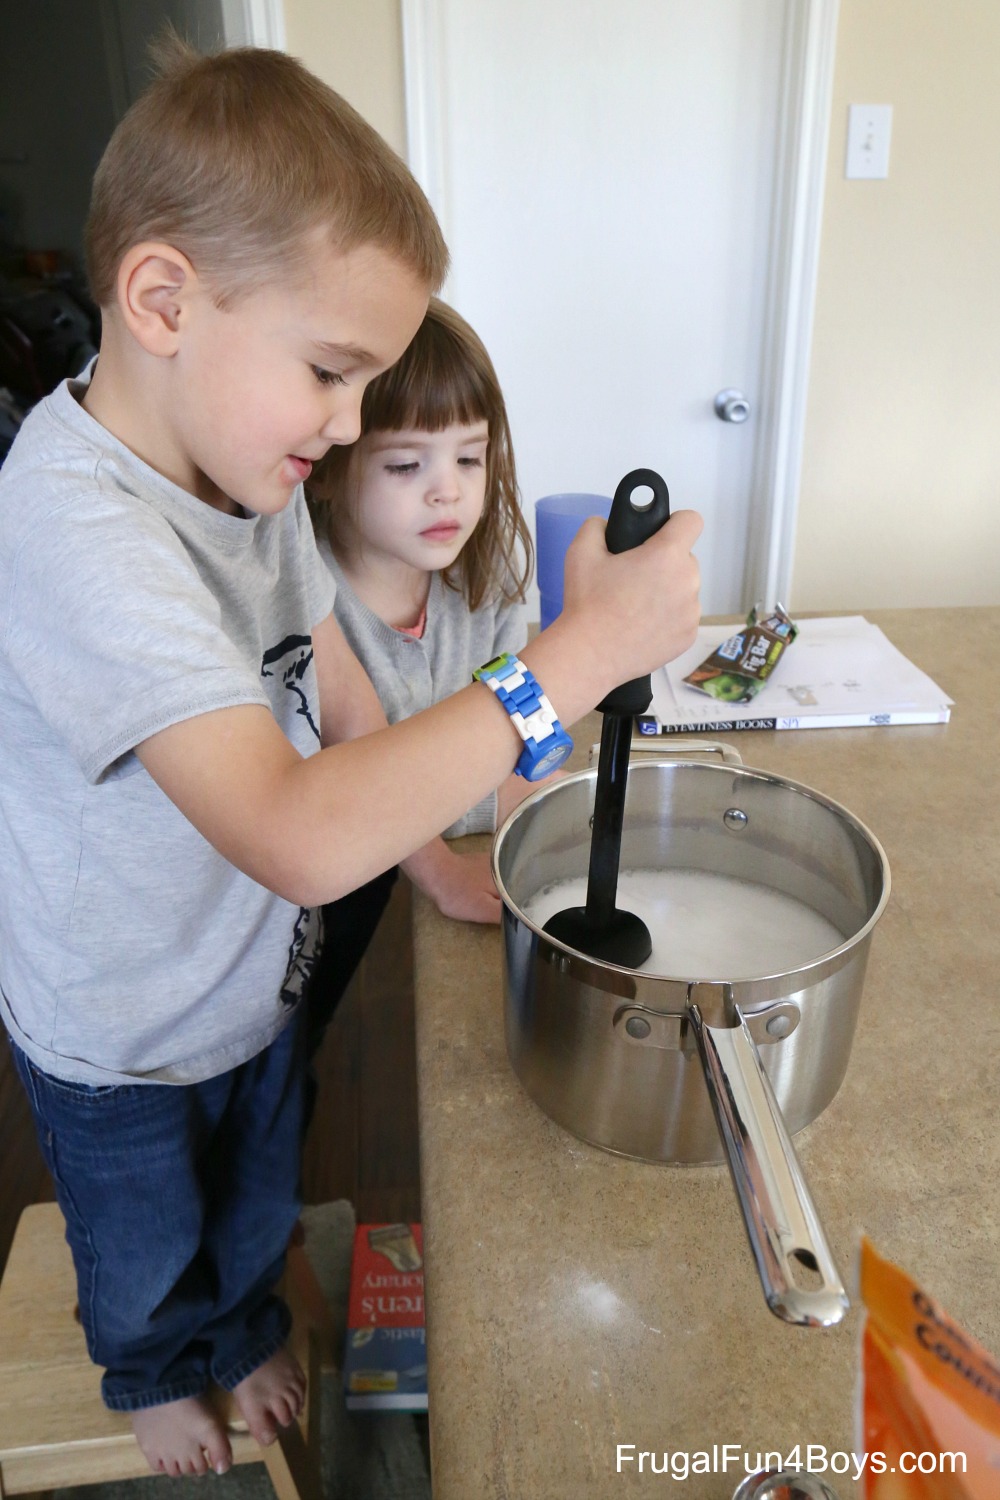
Step 1: Combine 4 cups of vinegar and 4 tablespoons of baking soda in a pot. Before we did this experiment, I read instructions for hot ice on a few different websites. I decided to use the amounts given on Playdough to Plato. Add the baking soda a little at a time so that when it fizzes it won't overflow over the edges of your pot!
Janie and Jonathan were quite impressed with this step.
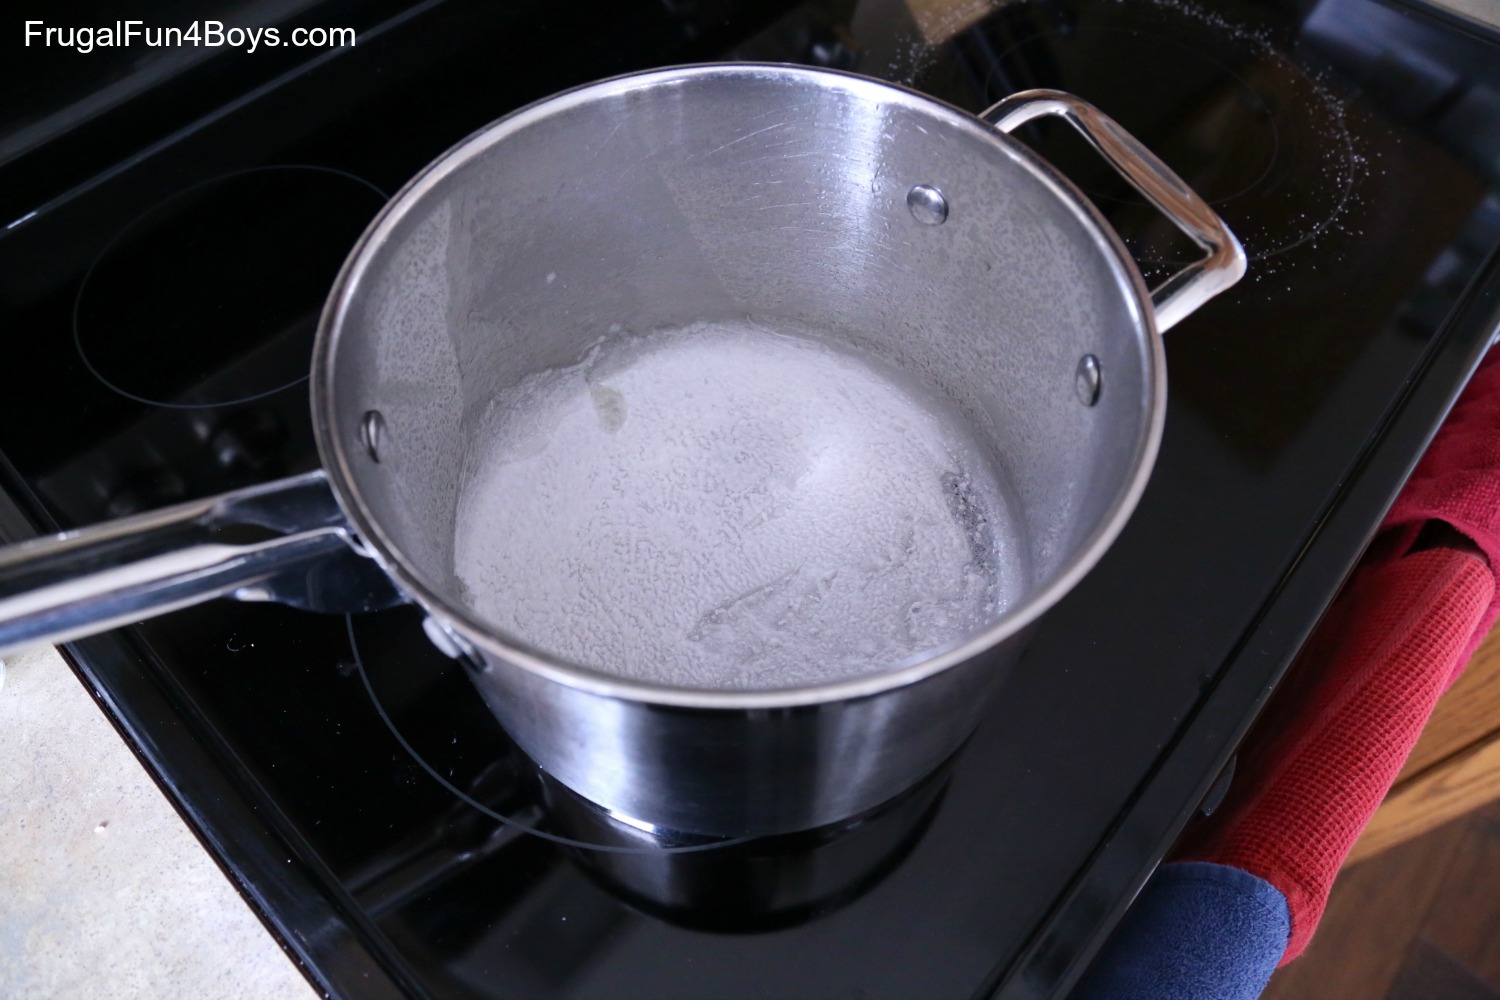
Step 2: You have now made sodium acetate! (As well as carbon dioxide – it was given off in the reaction, which created all that fizzing.) You'll need to boil the solution, though, to reduce the amount of water so that it is concentrated enough to form crystals.
Cook your solution over low to medium heat for about an hour. You want to reduce it down to 1 cup or less.
Now, the stuff I read online said that crystals would start to form around the edge of the pan. This is important because you'll need a few crystals as "seeds" to start the crystallization process. Well, our solution never formed crystals while it was cooking. When it was down to 3/4 cup, I finally stopped boiling it.
Step 3: Pour your sodium acetate into a glass container and put it in the refrigerator for 30 to 45 minutes.
We did this, and while it was in the refrigerator, I scraped some of the dried solution off the sides of the pot, hoping that it would work as the crystals needed to start the reaction.
It didn't work. Boo. We poured the solution over the pan scrapings, and nothing happened.
We tried putting it in the refrigerator for awhile longer. Still nothing.
But, this experiment is very forgiving! I left the solution on the counter and came back to it the next day. I decided to boil it a little more – maybe it wasn't concentrated enough. And we had never seen any crystals form in the pan. After about 10 more minutes of boiling, there still weren't any crystals on the edges of the pan, but I decided that the solution was reduced down so far that we just had to stop.
As soon as I poured the solution out of the pan and into a glass jar, the remaining liquid in the bottom of the pan crystallized instantly! So I knew we were getting somewhere!
This time, I put the solution in the freezer for about 20 minutes. Much faster.
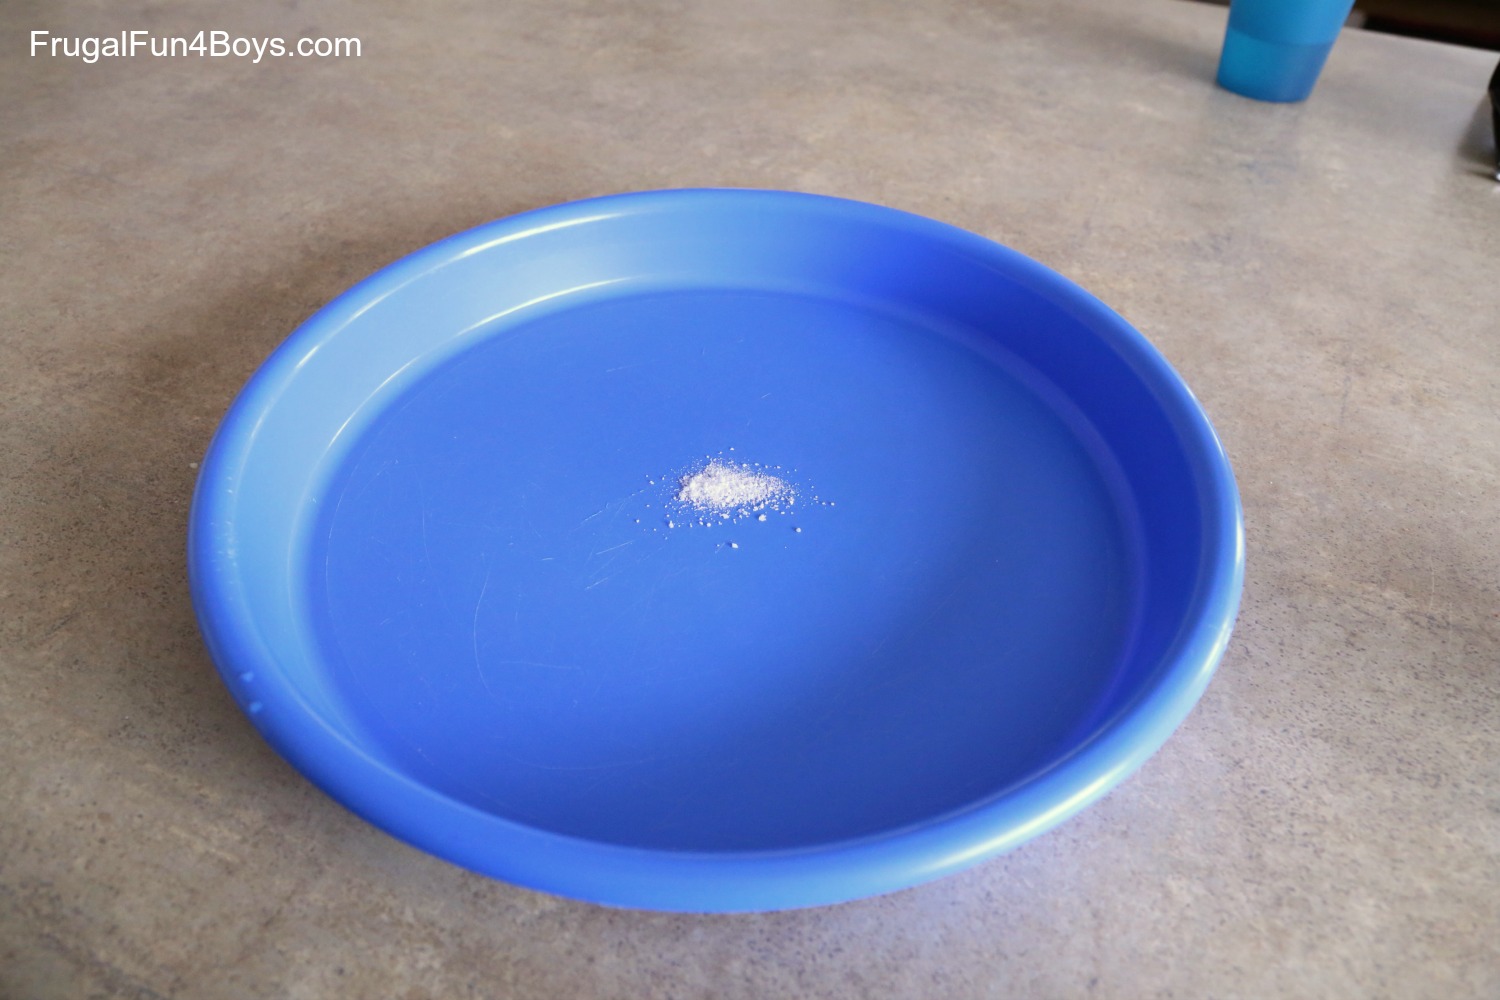
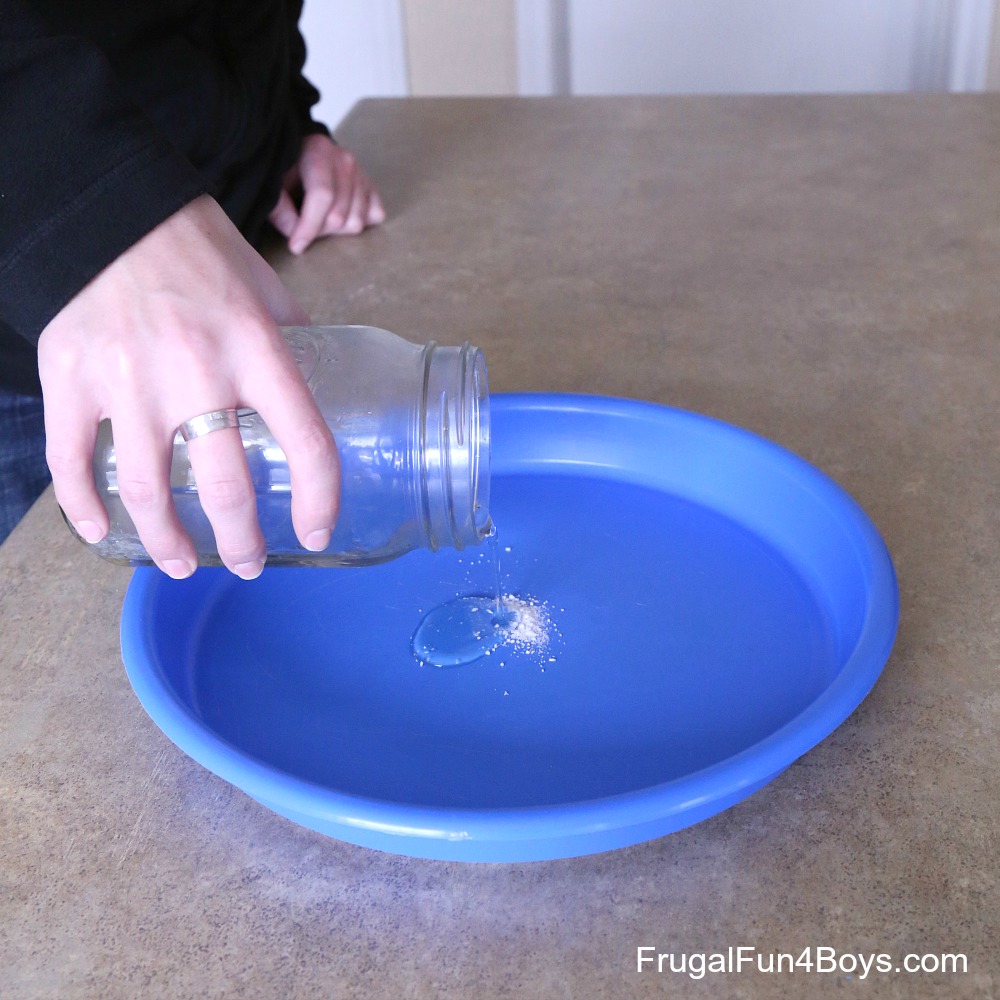
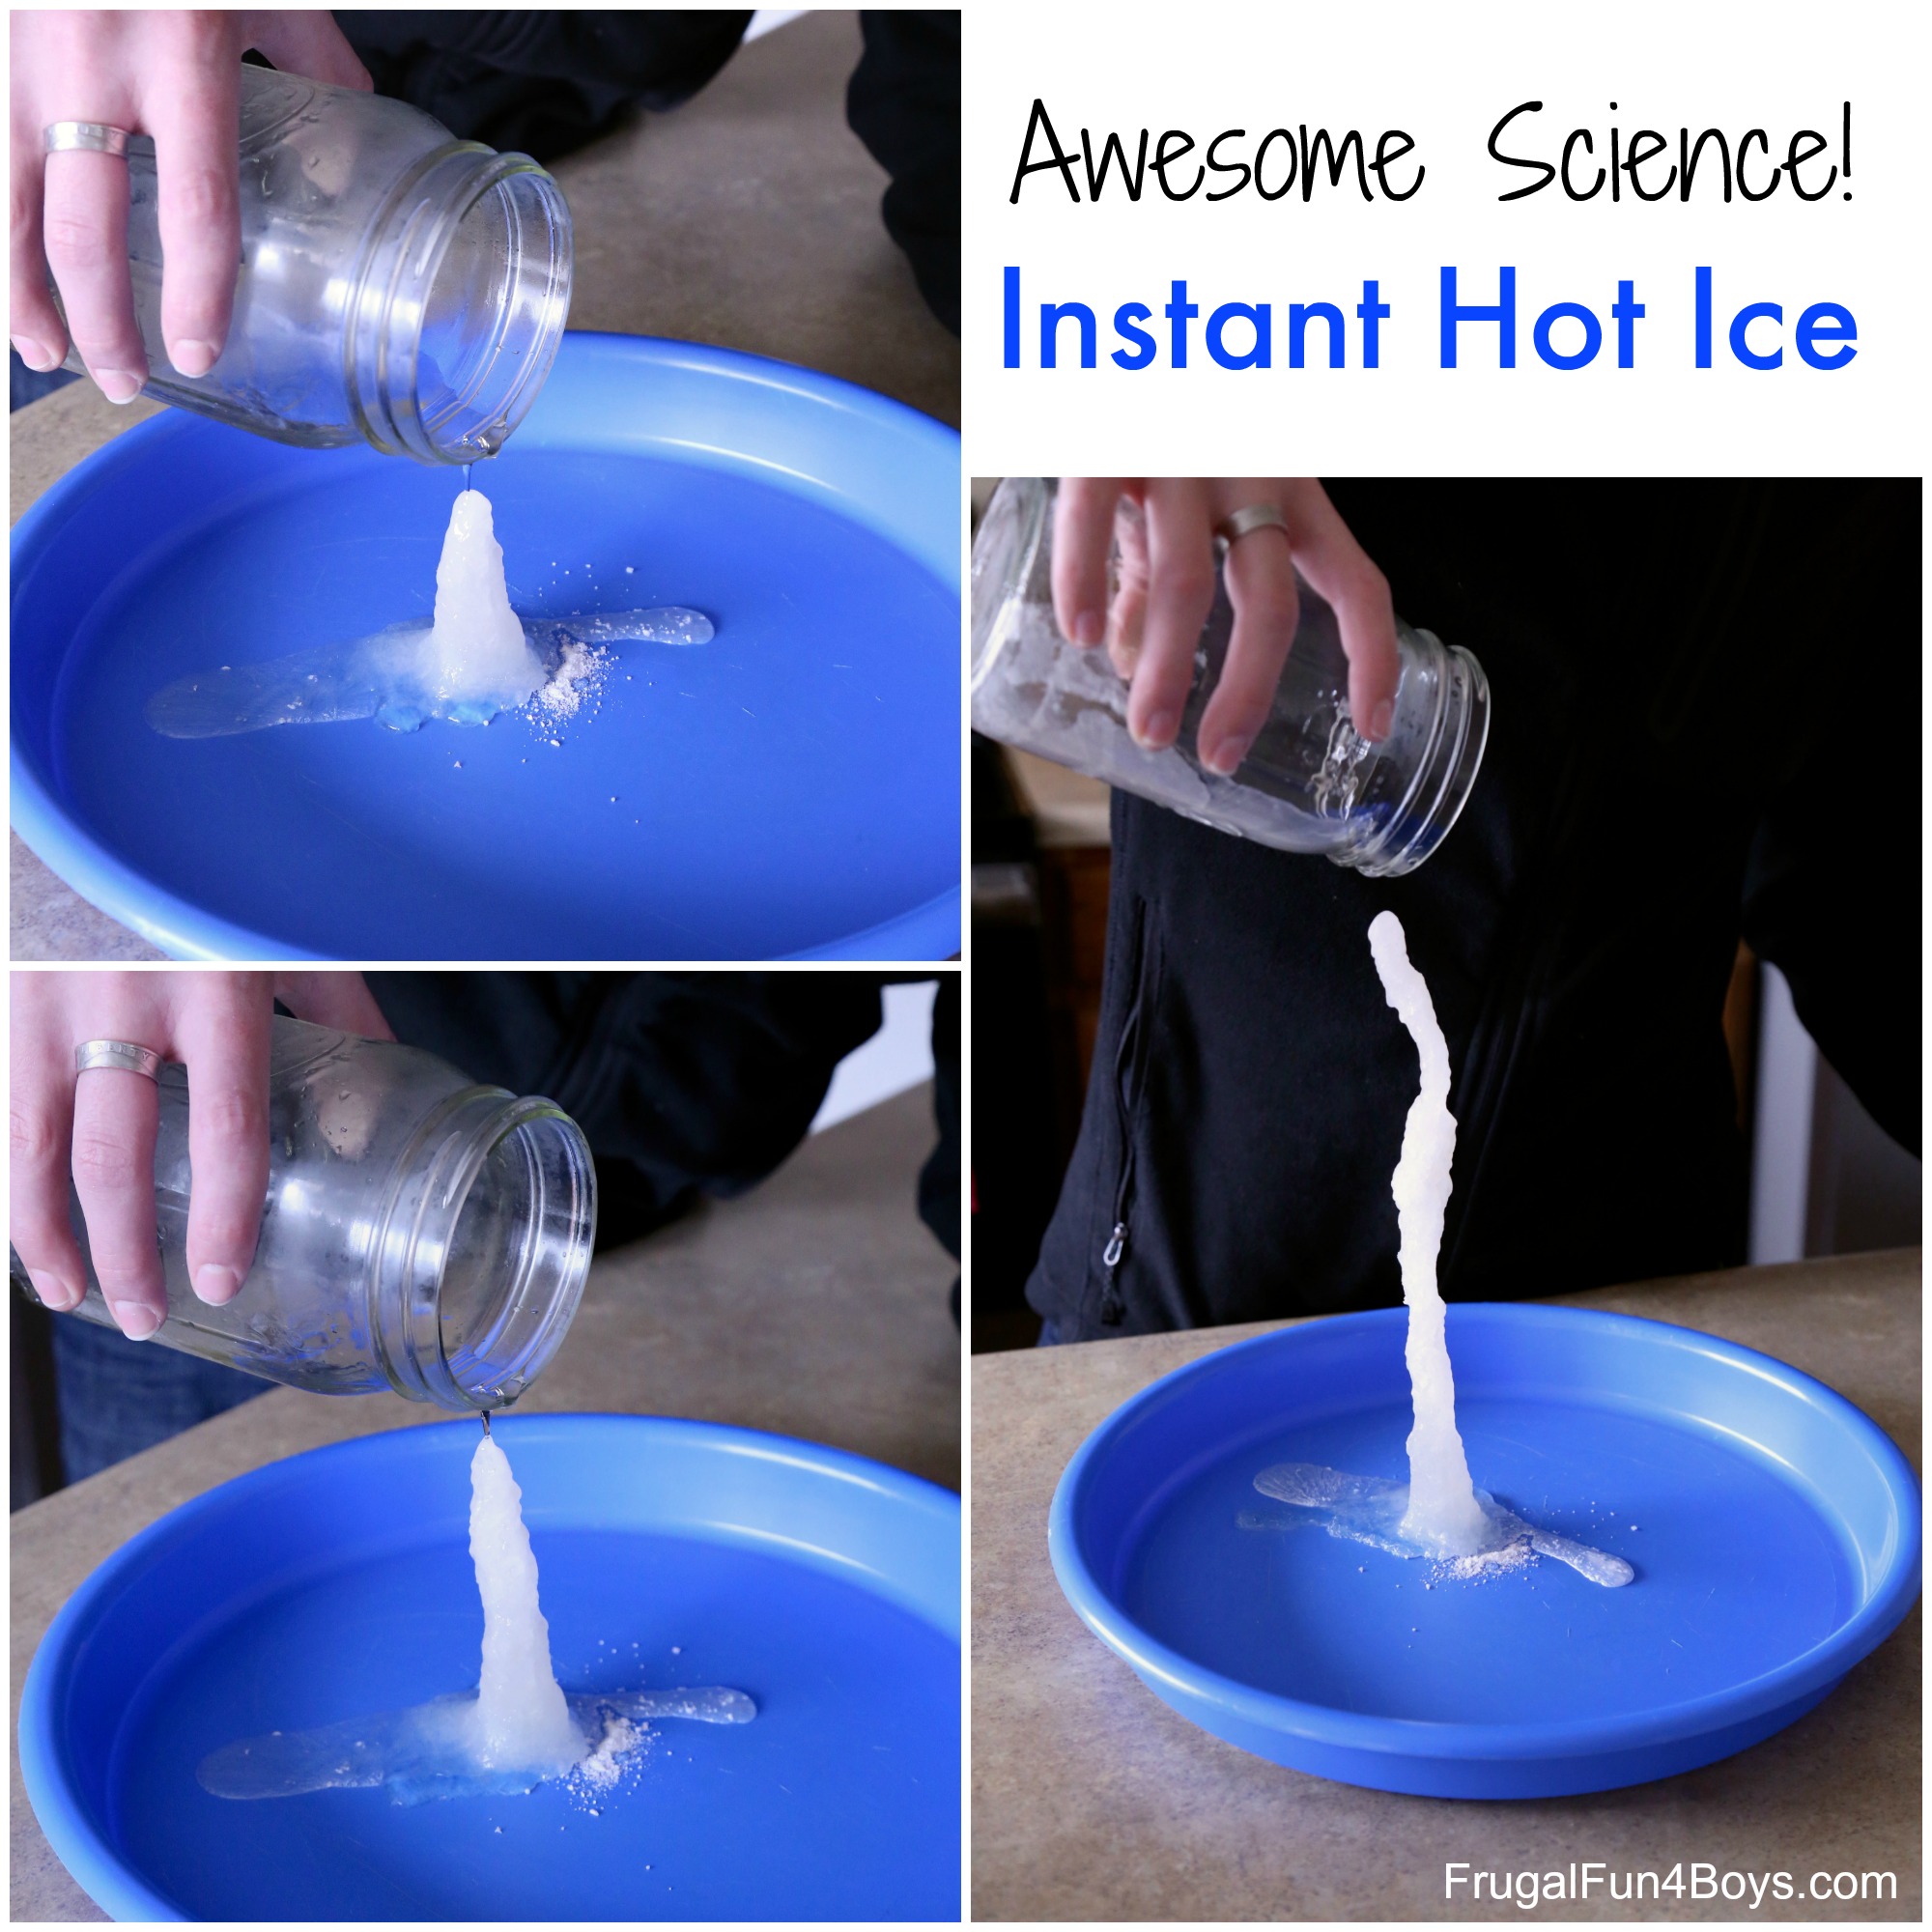
Step 4: Pour the cooled solution onto a few crystals that you scraped from the pan.
I scraped off some crystals from the bottom of the pan and put them in a plastic tray.
Then Aidan poured the solution very slowly onto the crystals.
The first little bit took a few seconds to crystallize… but it DID!
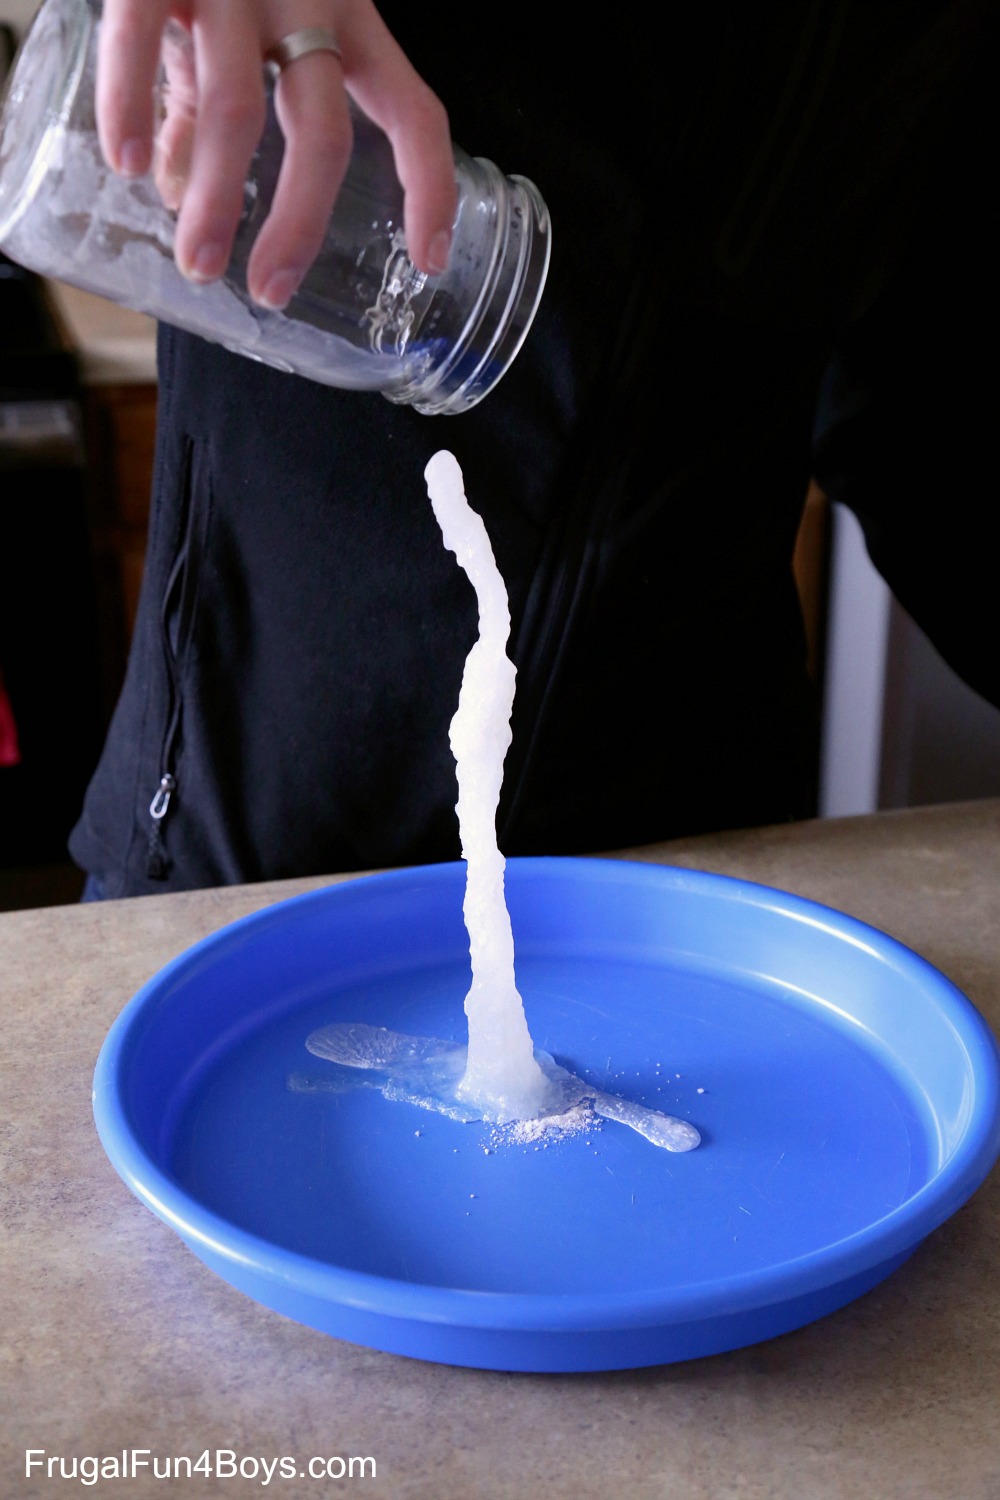
He kept pouring, a little at a time…
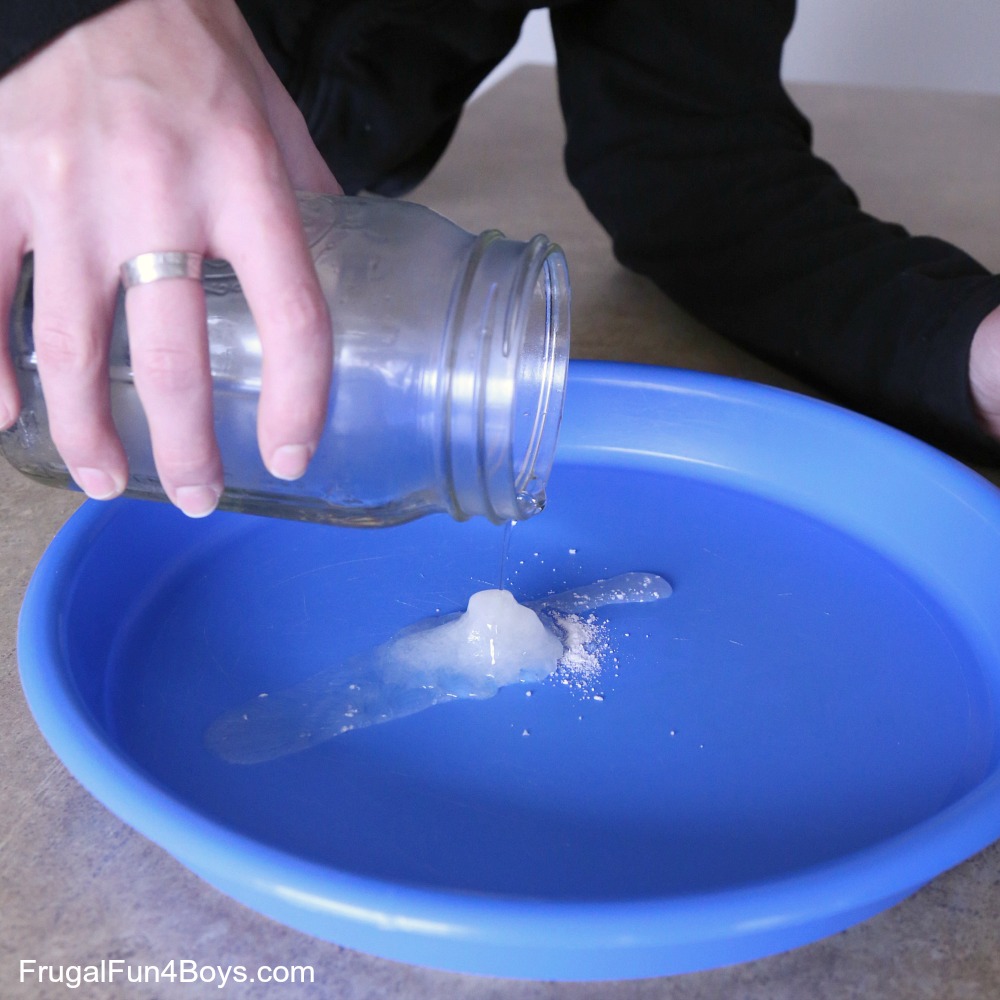
If you pour too quickly, the crystals will spread out horizontally. So we went nice and slow.
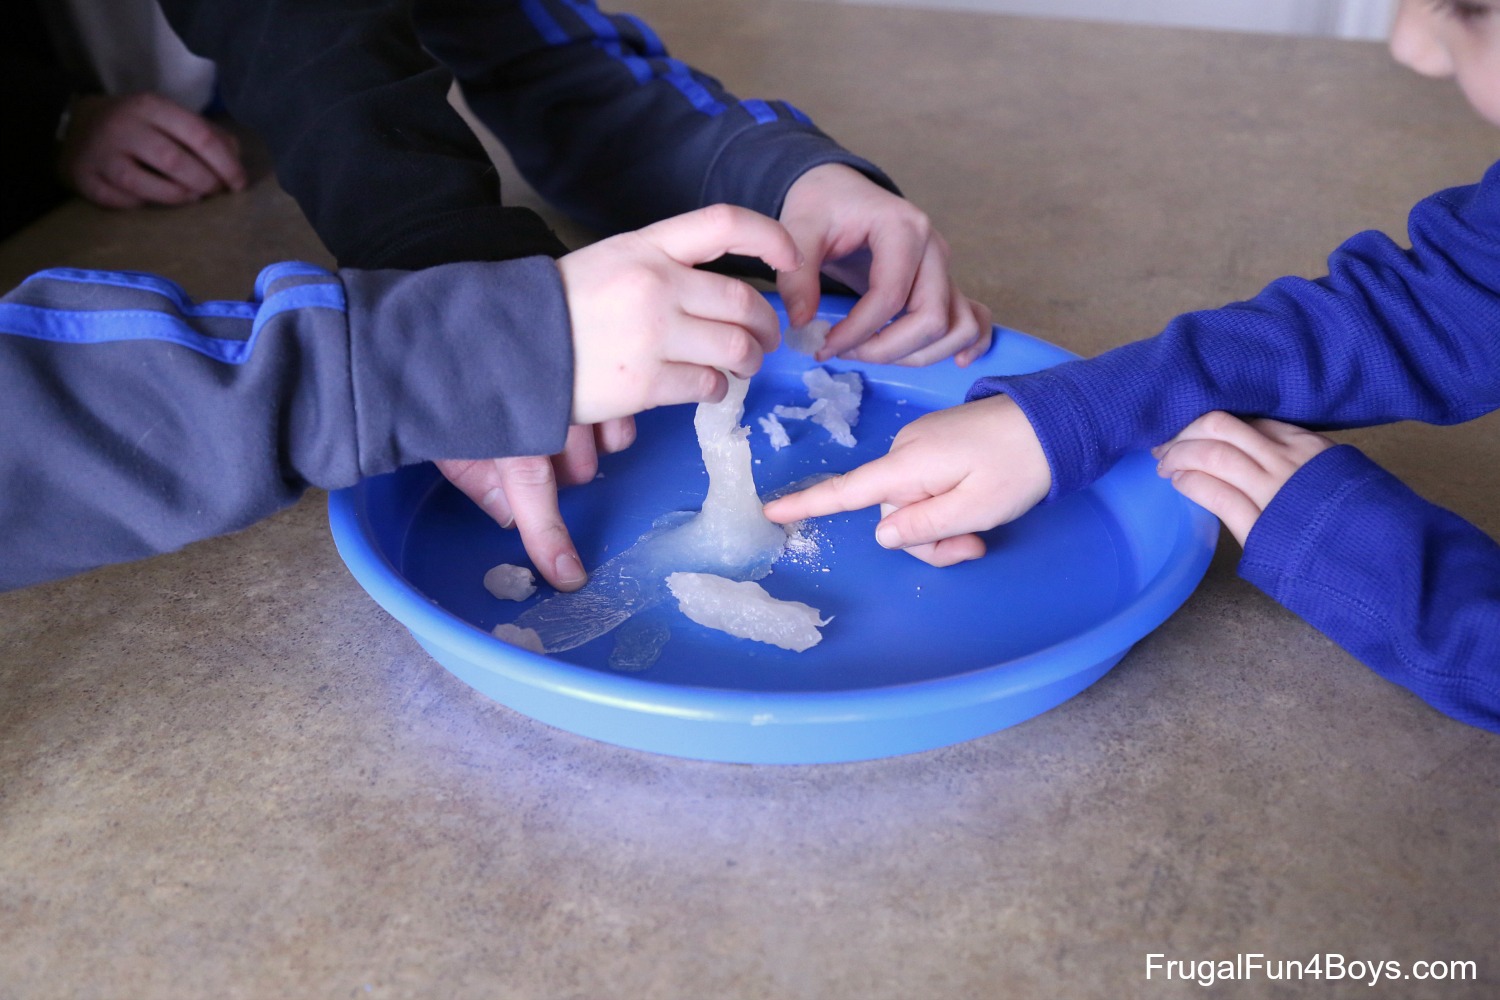
It was so fun to watch! By the end, Aidan was pouring just a drop at a time, and we could actually watch each drop piling up on top of the tower of hot ice.
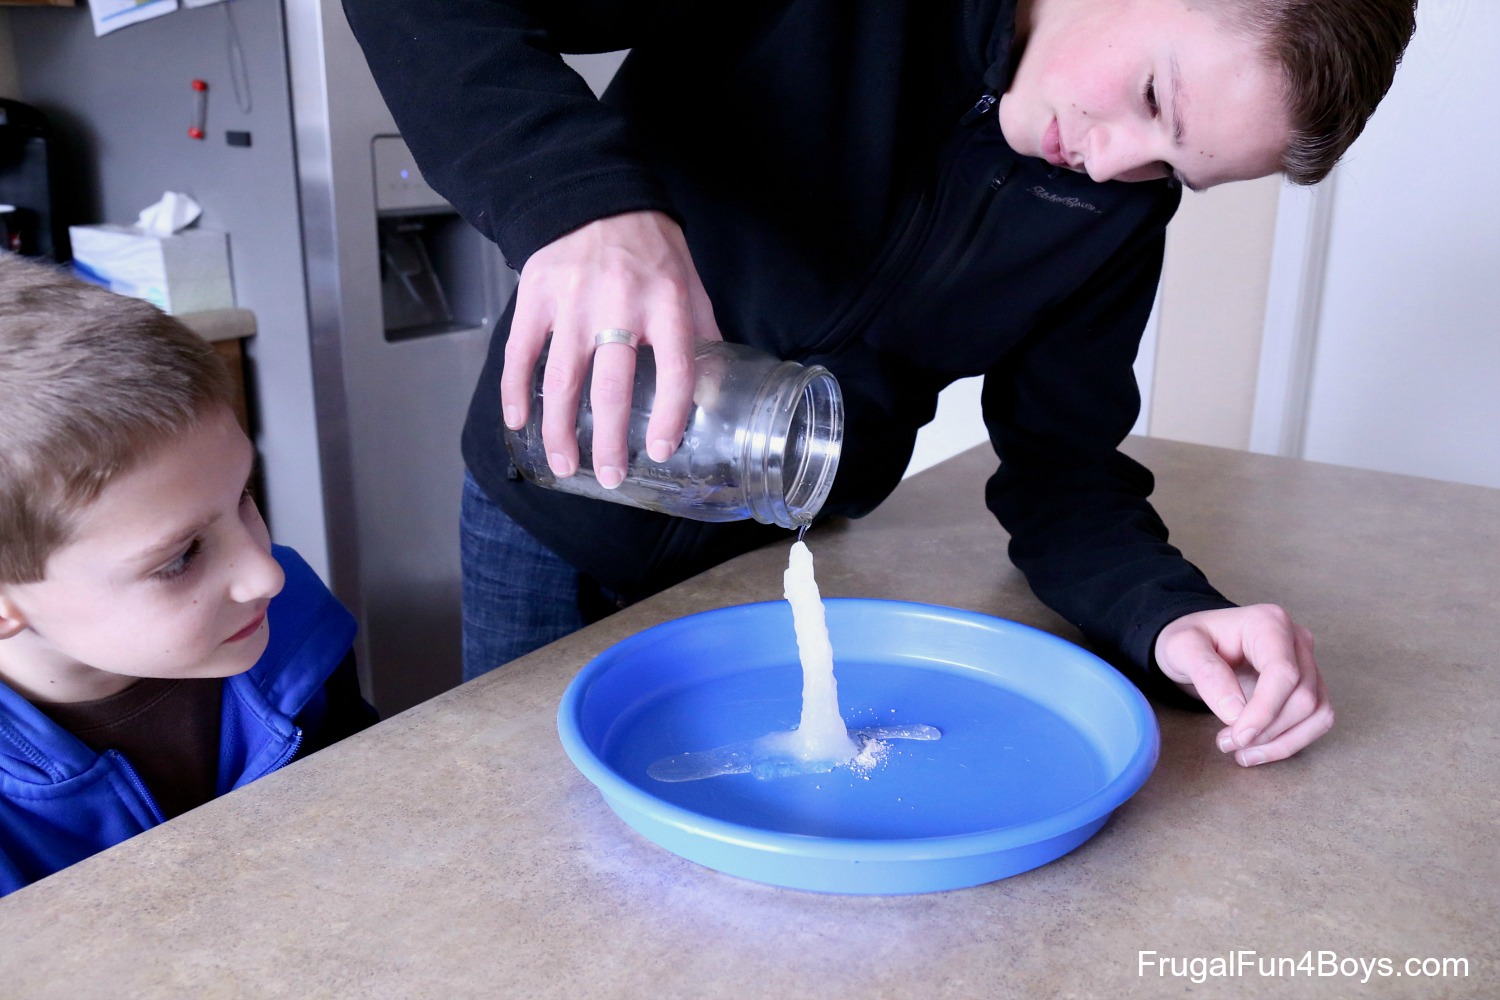
We didn't get a chance to measure our final tower, but it was impressive!
Why does this work?
The sodium acetate solution contains water. We reduced the amount of water in the solution by boiling it, but there is still water in there. The water molecules keep the sodium acetate from forming crystals. Well, crystals may start to form, but as a few molecules join together, the water molecules pull them apart again.
When we cooled the solution, we were able to bring the sodium acetate down to a temperature lower than the point at which it would normally become a solid. This word for this is supercooled.
By the way, we think of melting and freezing points mainly in reference to water, but all substances have a melting/freezing point. For example, copper remains a solid until it reaches 1,984 degrees Fahrenheit!
Back to the sodium acetate… The crystals in the tray provided a starting point for crystals to grow in the solution, called a nucleation site. This gave the sodium acetate the push it needed to crystallize!
The directions on Instructables said to filter the solution to get rid of any impurities that might inhibit the crystallization process. We didn't do that step, and it turned out fine.
The crystallization process gives off heat, so the hot ice is hot to the touch! Not hot enough to burn, though. We all had fun touching it!
Our tower was pretty flimsy and broke quickly, but we had a great time with this science experiment. If you want to repeat the process, you can melt the crystals down into a liquid again, cool it again, and make another tower!
Also, I was a little worried about our pot, but it was super easy to clean. The sodium acetate dissolves easily and rinses right off.
Have fun with science!
Source: https://frugalfun4boys.com/hot-ice-science-experiment/
0 Response to "How to Make Dry Ice at Home Easy With Baking Soda"
Post a Comment